Options for Custom Fabrication of Strap Assemblies
Stitch Patterns
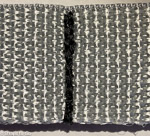
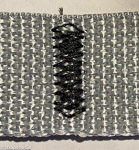
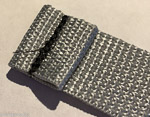
To choose the best stitch pattern one needs to know the strength required, type of application, intended life and cost factors. Generally the more stitches, the stronger the strap will be and the more expensive it will be. Check out our page on stitch strengths to give you a starting point.
Information on Stitch StrengthsSome of the more common stitch patterns are:
 |
 |
 |
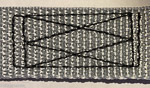 |
| Straight Across | Bar Tack | Box X | Argyle |
Strap Ends
The two most common methods of dealing with the end of a strap are to heat seal it so it won't unravel or to sew a "tab" on the end. The tab will prevent hardware like a side release buckle from escaping (they love to gain their freedom) and making the strap useless. Tabs do not work with cam or ladder lock buckles since you have to thread the end of the webbing though every time you use the strap.
 |
 |
| Heat Sealed | Folded Tab |
Prototyping
Many projects require the making of prototypes prior to going into production. We do charge to make prototypes but depending on the size of the production order, part of the prototyping fee may be credited back. Prototyping can be expensive. If we need to purchase webbing that is a non-stocking item, normally we have to buy at least a roll. The same can be true for hardware, the dreaded minimum order. Some jobs require custom tooling and others have specific thread requirements. These are just the hard costs. Time is spent providing input on the design, sourcing materials and of course making the samples themselves.
We can not make prototypes or units for First Article Inspection for free. Also outside our scope are: load testing, product drawings and preliminary design (there needs to be a starting point).