-or a story about Christmas past
It’s always nice to make one’s gifts rather than go to the store and buy them. You might save a few dollars and have the satisfaction of knowing you actually were able to complete a task. That was my thought when I decided to make gaiters for my wife and I to go with our new snow shoes. How difficult could this be? I had material and most of the hardware. Sewing, no problem, several machines to choose from. The ordeal started out when I got the fabric pattern.
The Green Pepper pattern company provided the pattern (for a small fee) and I carefully unfolded it and read all the instructions. This was my first time using a store bought pattern, for everything we make the patterns are things we have developed, not purchased. There were a lot of instructions, including one that was hidden on the back of a page stating that there was an error in printing the pattern and that one needed to fix that prior to cutting material. After finding this I felt confident going ahead and cutting my materials.
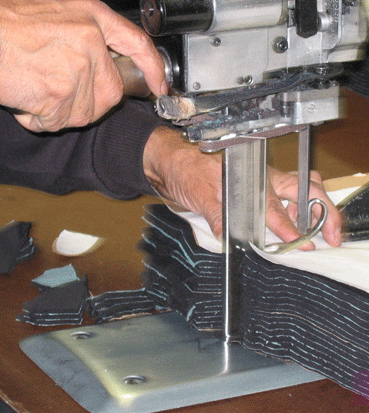
I admit that “home sewing” is not something I have had any training in. For that matter most of what I have learned about commercial sewing has come from trial and error, the internet and talking with others, basically no formal training. When I think about fabric cutting this is what I see-
Multiple layers of fabric all being cut at the same time. Little did I know that there is another way of doing this that is very common with home sewing.
Let me explain. If I need both a right and left hand version of a piece of material I cut the two pieces out using two different (handed) patterns or just flipping the pattern over. My patterns are not light paper, mostly they are made from plexiglass so you can hold them down and cut around them. This works great for simple shapes and that is what we use at work. The technique used by many home sewers is to take the material and fold it in half. Then they mark the pattern on the top piece of material and cut through both. Amazing, you end up with mirror images of the pattern (right and left hand) in one simple step. OK, it is simple if you know what you are doing and clearly I did not.
So I got through cutting all my pieces out, unaware of the folding trick, and went to put my first gaiter together. Guess what, It wouldn’t work. It was apparent that I had twice the number of right hand pieces needed, and no left handed ones. My first thought was the folks at Green Pepper had really messed up this pattern. There was the one error that they noted on the back of the instruction sheet, maybe they had made more. So I picked up the phone and called, getting through quickly to a staff member who told me that I had not read the small text where it said “FOLD”. It was explained to me that they try to keep everything as simple as possible and don’t expect people with only commercial experience to be using their patterns. This makes sense, I doubt that there are many out there who sew commercially that have not done some home sewing.
The good news is that I didn’t have to waste much material and quickly had both my left and right handed pieces cut out and ready to assemble. Everything went smoothly until I got to installing zippers. I carefully read the instructions, picked up one of the gaiters and installed the zipper. Then I picked up the second out of the pile and began thinking this was easy. I had been lucky the second time and had picked up a gaiter that was the same “hand” as the first. Then came the third and installed the first zipper half only to realize that it was on the wrong side of the gaiter and I had been foiled once again. Take the piece out and install the other half of the zipper in its place. I was on a roll and soon had them finished.
So what did I learn from this adventure?
- Beware of “hands”.
- Home sewing is quite different than commercial sewing. I have never had to deal with patterned/printed material and have trouble imagining how much more trouble that would add to making something.
- The feeling of accomplishment when producing a present is great.
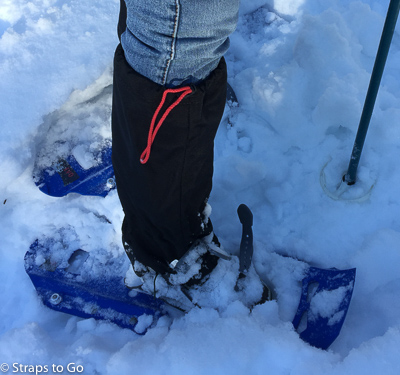
- These gaiters keep our legs and feet dry!
