Nylon web dyeing

How does nylon webbing get its color? There are a number of ways, each with its own good and bad points.

One can dye the yarn as it is manufactured. This is called solution dyeing and the yarn ends up looking like this:

solution-dyed

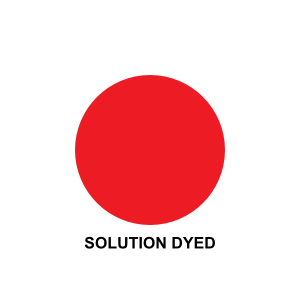
The color goes all the way through the yarn and you end up with the most colorfast product. Some strength is lost and solution dyeing requires large production runs.


Another way is to dye the yarn after it has been drawn. This is called package dyeing and the finished yarn would look like:

package-dyed

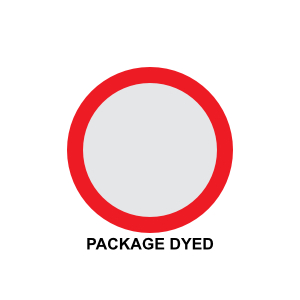
The color is just on the outside and the strength of the yarn is not affected which is important in load bearing applications like safety harnesses. However if the yarn is used in a high abrasion application like a carpet having the color go all the way through is a plus.


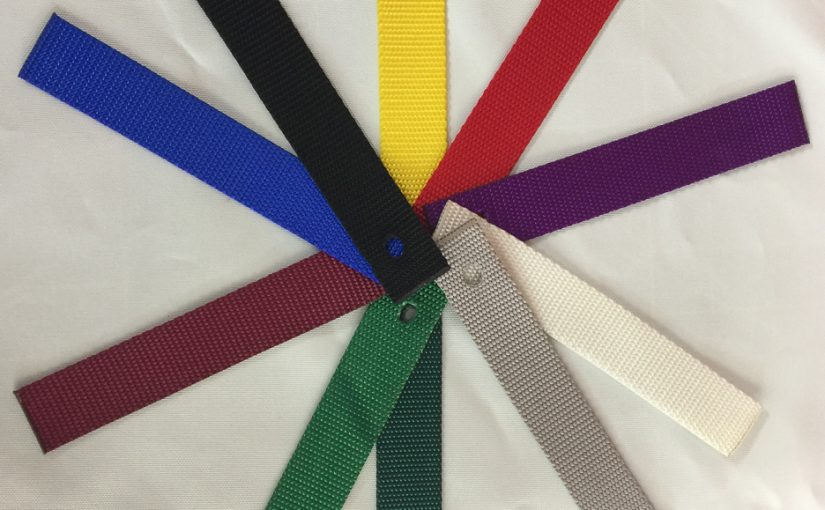
Both of the methods discussed above require dyeing the yarn prior to manufacturing the webbing. If you have red yarn, you are going to get red webbing but what if you need purple (for all those Husky and Tiger fans)? Back to the vat to dye some purple yarn and then manufacture purple webbing. The minimum quantity you want to make is quite large for either of these processes. As with most items there are popular colors and those you just have to have but don’t sell in huge quantities. So how do you get all the colors offered without having to produce a lifetime supply of a marginal selling color?

The answer is to manufacture nylon webbing with un-dyed yarn (often called greige goods). Then when the order comes in for purple nylon webbing you piece dye your webbing. The end result will be webbing with good colorfastness without loss of strength. Like with package dyeing the color will just be on the outside, like staining wood. Minimum orders are low enough to allow for a wide variety of colors to meet all your needs.

Can you specify what process is used for your webbing? Not easily. If your needs are large enough to purchase a whole production run and you are willing to wait I am sure the mill will be willing to take your money. We deal with manufacturers we trust and the materials they provide meet our (and your) needs.

Weird Webbing Words

It’s time for a bit of fun and after the last two years of election campaigning, we all can use some. Every industry has words that are unique to it and some times they leave you scratching your head wondering how they were ever adopted. The webbing world has a few to add to the list.

  • Crock– not a pot, oops being from Washington pot has other meanings here. This is not a device for cooking or a load of malarkey but a test for colorfastness.
    Determines the amount of color transferred from the surface of colored textile material to other surfaces by rubbing.

    • Sample is placed on crock-meter
    • A 100% cotton white fabric cloth is rubbed across the sample 10 times in the wet and dry state
    • The cotton cloth is evaluated for staining
      So in order to do crock testing you need a crock-meter and now I had better quit while I am ahead! Just in case you want to see a video of a crock test here you go. Be careful, it’s not very exciting.


  • Denier- yes this is the correct spelling, the word is not dinner or diner. Like tex ( see below) denier refers to the weight or thickness of yarn. I see it used mostly when describing fabric weights. Some of the coated fabrics we use are 600d (the small ‘d’ is the abbreviation for denier) and other heavier ones are 1000d.
    A unit of weight by which the fineness of silk, rayon, or nylon yarn is measured, equal to the weight in grams of 9,000 meters of the yarn and often used to describe the thickness of hosiery.


  • Greige– possibly the worst looking word on the list. Some say it is a color that is between gray and beige. Most likely a relative of sepia, another one of those colors that is different to each individual. Don’t go telling a printer that you want sepia colored type on your business card. You will drive him/her to drink.
    In the webbing world it refers to unfinished goods; not fully processed; neither bleached or dyed.


  • Tex– obviously a misspelling by my grandson, it should be T-Rex but kids these days shorten everything.
    Or it is a way of measuring thread size-
    The Tex standard uses 1,000 meters of thread per gram as the starting point. This means if 1,000 meters of thread weighs one gram, it is Tex 1. If 1,000 meters of thread weighs 25 grams, it is Tex 25.
    On most of our straps we use Tex 90 threads when sewing, for some heavier jobs we use Tex 135 thread.


  • Warp– to move (a ship) along by hauling on a rope attached to a stationary object on shore or-
    (in weaving) the threads on a loom over and under which other threads (the weft) are passed to make cloth.


  • Weft– not a misspelling. While the Warp threads go lengthwise is a piece of fabric the Weft threads go left to right, or as I was taught- weft to right.

  • Woof– again this word has specific meanings here in Washington being the home of the Husky’s. Woof is what their mascot says, or a bunch of fans tailgating prior to a game. What does it have to do with webbing, nothing but it really sounds like it should be in the list.

DIY Para Cord Key Fob

After my last attempt creating something with parachute cord, I decided to try making a key fob using a snake knot and two different colors of para cord.

key1

My current fob was just a piece of cord tied together, nothing really fancy.

key2

End cuts of black and white para cord were lying around so they would be the materials of choice. The first, and what turned out to be the hardest, part of the project was joining the two pieces.

key3

Here I am heating and melting the end of the white cord.

key4

Then quickly heating the black. If we weren’t trying to take pictures doing both at the same time would make this much easier.

key5

Then stick the two melted ends together (while they are still melted) and push them together. You can wet your fingers and squeeze the joint to get it a bit smaller but be careful, the molten material will be hot! Now that the hardest part of the project has been completed, we can start making snake knots.

key6

Put the cord through the slot on the key.

key7

Notice how the black cord is on the left. When you start each knot, the cords will be in the same locations, black on left, white on right. Take the black cord and go over and around the white cord, then back under the black.

key9

Now take the white cord and go under the black, then over and through the hole created by the black cord. Tighten everything up and one knot has been completed.

One thing I learned is to keep the tension on the knots as you tighten them consistent. That will keep everything looking nice and even when you finish.

key12

Keep up the same routine. Black cord: over then under. White cord: under then over.

key15

Quickly you will see your fob taking shape. This is really a simple knot and using two colors of para cord makes it even easier.

key17

I just used my hot knife to seal the ends of the cord so everything would not come undone.

key18

Which gave me a key fob that looks like this. You can see that I was not really great at keeping the tension on the knots consistent, next time I will do a better job.