Nylon webbing in a marine enviroment

Get nylon webbing wet and what does it do? Shrink. Does this matter? It depends on your Coast Guard inspector.

Years ago we used to service inflatable life rafts. For quite some time a US Coast Guard inspector would spend all day at our shop overseeing what we were doing. Generally they knew what we were supposed to do and stayed out of the way unless they saw something questionable (either with the raft or our work).

Seattle was a training port so there were times we would get untrained inspectors. Either they used their time to learn or once in a while we would get someone who wanted to make our life difficult. One day we had one of the latter classification and he checked the rafts out we were working on, regulations in one hand, tape measure in the other. He came across an older raft that had been stowed in a very wet place on the vessel. The inspector went around the raft measuring the distance from the exterior grab line to the floor. When new there is a specification for this distance but on this raft the grab lines were too far off the floor.

The image above shows the black webbing grab lines and how they are supposed to hang down.

The inspector told us that he would not certify the raft until we had moved all the grab lines down so that the distance would comply with the regulations. He did not understand that nylon webbing shrinks when it gets wet, and this raft had been really wet. Also missing from his understanding was the specification was a manufacturing spec, not one for a raft that had been in service. Still he would not accept our reasoning and once again informed us that we must rectify the situation.

Several phone calls later the head of inspections in Washington, D.C. set the new inspector straight. He signed off the raft and we never saw him again.

So if you are designing a strap where the length is critical, consider the environment it will be working in. If you are using nylon webbing and it is going to get wet, allow for shrinkage.

Lifejacket (PFD) Buckles

uscg life jacket buckles

Your lifejacket (PFD) has a broken buckle, wouldn’t it be nice just to replace the broken half rather than buy a whole new lifejacket? If only it was simple to find the correct buckle.

When a manufacturer wants to sell a lifejacket to the public (in the United States) they need to get it approved by the United States Coast Guard. That entails working with a testing laboratory like Underwriters Labs who will review the design and then test product samples to ensure that they meet the proper USCG specification. After passing the results are sent to the USCG who will then issue the approval. Once in production the testing lab will continue to evaluate the production, making sure that every life vest meets the requirements.

Part of this whole process is specifying the materials used. Foam, fabric, webbing, buckles and even the labels are specified and can not be changed without going through the approval process once again.

Since we are interested in the buckles, take a look at the image above. That Kent commercial lifejacket uses two different buckles on its closure straps. If both male halves (the most common part to break) were to break you would need to source two different buckles which might not have come from the same buckle manufacturer. Most of us who sell replacement buckles work with one primary manufacturer. Ours is American Cord and Webbing (ACW) and their parts are not interchangeable with buckles made by Fasnap, ITW Nexus or others. Even to get this far you need to identify the buckle manufacturer and since most “value priced” lifejackets are made overseas, so are the buckles and those buckle manufacturers do not have distribution in the United States.

If you happen to have a heavy duty sewing machine you might think about replacing both halves of the buckle with something you can easily find. Unless you use the exact buckle and sew it in the same manner and use the same thread you will void the USCG approval. The lifejacket would no longer be counted as part of your carriage requirements. Worse yet, should something go really wrong and the lifejacket needed to be used- and then failed, the vessel owner would be liable.

Enough doom and gloom….

We do carry two products made by ACW that are used on USCG approved life jackets.

    1. Type V Side Release Buckle
      Type V Side Release BuckleDesigned for use with 1″ webbing but no longer in production. We purchased the last of ACW’s inventory and as of March 2018 have a good supply.
      Order 1″ Type V Side Release Buckles 
    2. Type V Slide
      Type V Slide
      Designed for use with 1″ webbing.
      Order 1″ Type V Slides

ACW only makes these parts for 1″ webbing. If you need either, or both, of these place an order online or give us a call at (253) 627-6000 and we will get them right out to you.

Staking trees using web straps

The rainy season is upon us and some of your recently planted trees are leaning over due to really wet dirt or maybe strong winds (or a combination of both). The tree needs to be supported so it can grow straight up, unlike the one above.  In the past many have used wire to do the job. It is easy to work with and we usually have some laying around the house. While this is a quick fix, the tree won’t like it. Over time the wire will cut through the bark and in to the tree and then nutrients have no way to travel past, really damaging the tree.

Arborists tell us to provide padding wherever we support a tree. Wire passed through garden hose has been used or a couple of pieces of wood between the wire and the tree will also work. A simpler way is to use a web strap.

img_1616

Here we have a tree planted in a sidewalk cut out that has been staked using three ratchet straps. This allowed the tension on each strap to be easily and quickly set and adjusted if needed.  The way the webbing was attached to the tree is better than a single piece of wire but would not be good in the long term.

The National Forest Service does not allow tree attachment points for backcountry horse pickets or even hammock suspension to damage the bark. The minimum with webbing used to comply with this requirement is 2″ and that would be a good place for the homeowner to start.  A simple endless sling will protect your investment and provide a safe place (as far as your tree is concerned) to attach a rope, wire, ratchet strap or whatever you plan on using to get your tension. You could also use a single loop strap but this would require tying a knot in the webbing where you plan on attaching your tensioning device. We could also make you a strap with a loop in each end which would really be the best alternative. This way it could just go around the tree and not “choke” it. It would need to be placed above a limb so that it wouldn’t move down the tree as it sways in the wind.

Cannery gear

We were asked to make a knife sheath and adjustable belt for workers in fish canneries. They needed to be rugged, inexpensive and easy to use.

The sheath is made from our 2″ #673 webbing which is extremely stiff and in commonly used for scuba divers weight belts. A pair of rivets and a bit of sewing and you have a functional sheath.

Every sheath needs a belt and this one needed to be adjustable and easily worn over cannery aprons or waterproof rain gear.

Here we used heavyweight #560 polypropylene webbing in an 1½” width. There are a few inches of elastic webbing to keep it taught without being uncomfortable and a side release buckle to make it easy to put on and take off. Finally a slide keeps the tail end of the belt secure and makes sure it doesn’t decide to loosen on its own accord.

Like the sheath there is minimal labor in producing the belt, helping keep the cost down. Is this something to wear around town? No, but it does fulfill the need if you are working in a cannery.

Rollie’s View- changing seasons

I am old enough to have grown up in a time when food was seasonal. Enjoy it when it is available, soon it will be gone. Asparagus, artichokes, salmon- there was a season for everything. Now you can get many things 12 months out of the year, waiting is not required.

Soon we will be moving Straps to Go to Cle Elum, WA which is a rural community which bills itself as being in “the heart of the Cascade’s” and is about 90 minutes east of Seattle. Last Sunday my wife and I were headed in to town on our way back to Tacoma. There was a cardboard sign on the side of the road stating Fresh Morels. We didn’t see a sign as we approached and missed the pickup truck on the side of the road but were lucky enough to see a sign a but further down the road. U turn and back to check them out.

Freshly picked huge morels for $10.00 per pound. A bargain and fresh! We bought a pound to enjoy with our neighbors in Tacoma and were not disappointed. They brought back good memories of seasonal produce and when coupled with a little butter made an excellent dinner.

Hopefully our move to Cle Elum will provide us with more opportunities to sample seasonal foods once again. Perhaps this will help us think of new strap offerings provide we don’t make too many U turns.

More load testing

A strap was needed with 1000 pound breaking strength using 1″ polyester webbing that has a minimum breaking strength of 1000 pounds. We needed to test stitching patterns to come up with one that would provide the breaking strength needed and still be economical to sew.

Here is a test of a Double-W stitching pattern using Tex 90 polyester thread. As you can see we have exceeded the 1000 pound requirement and when the load was relaxed both the webbing and stitching looked great.

We also tried a few other stitching patterns but this one performed the best. The others would hold the load but afterwards it was obvious that they had been strained.

If your project requires something a bit out of the ordinary give us a call and let us offer some suggestions. (253) 883-5800

New shipping options coming soon

Most of your orders for webbing and buckles have been shipped out using Priority Mail.  This has proven to be an inexpensive and reliable way to get goods to our customers. At times we receive orders that are so small that the minimum charge for Priority Mail is larger than the cost of the goods. We have been shipping these orders using First Class Mail which generally saves you, the customer, a couple of dollars.

We are working on providing that option for all orders that weigh less than 16 ounces. This requires that our shopping cart is able to calculate the weight of your order and then serving up the appropriate shipping options with their costs. Most of our components have been weighed and entered in to a database. Code is being written to do the calculations but it still needs to undergo testing. Our hope is to have this up and running by the end of March.

In the interim, if you are ordering a couple of buckles and want them to ship First Class Mail, let us know in the comments section. We try to keep your shipping costs as low as possible anyway but there are times when you might want an order a day earlier (First Class Mail tends to take a day longer than Priority Mail) in which case tell us what your needs are.

Wearing frustration on our legs

-or a story about Christmas past

It’s always nice to make one’s gifts rather than go to the store and buy them. You might save a few dollars and have the satisfaction of knowing you actually were able to complete a task. That was my thought when I decided to make gaiters for my wife and I to go with our new snow shoes. How difficult could this be? I had material and most of the hardware. Sewing, no problem, several machines to choose from. The ordeal started out when I got the fabric pattern.

The Green Pepper pattern company provided the pattern (for a small fee) and I carefully unfolded it and read all the instructions. This was my first time using a store bought pattern, for everything we make the patterns are things we have developed, not purchased. There were a lot of instructions, including one that was hidden on the back of a page stating that there was an error in printing the pattern and that one needed to fix that prior to cutting material. After finding this I felt confident going ahead and cutting my materials.

I admit that “home sewing” is not something I have had any training in. For that matter most of what I have learned about commercial sewing has come from trial and error, the internet and talking with others, basically no formal training. When I think about fabric cutting this is what I see-

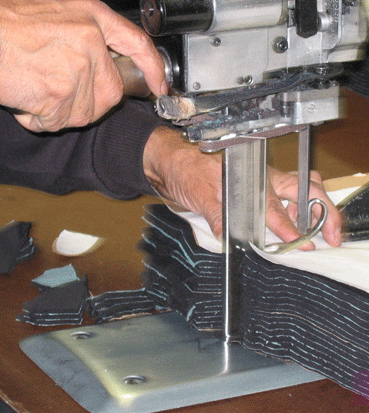
Multiple layers of fabric all being cut at the same time. Little did I know that there is another way of doing this that is very common with home sewing.

Let me explain. If I need both a right and left hand version of a piece of material I cut the two pieces out using two different (handed) patterns or just flipping the pattern over. My patterns are not light paper, mostly they are made from plexiglass so you can hold them down and cut around them. This works great for simple shapes and that is what we use at work. The technique used by many home sewers is to take the material and fold it in half. Then they mark the pattern on the top piece of material and cut through both. Amazing, you end up with mirror images of the pattern (right and left hand) in one simple step. OK, it is simple if you know what you are doing and clearly I did not.

So I got through cutting all my pieces out, unaware of the folding trick, and went to put my first gaiter together. Guess what, It wouldn’t work. It was apparent that I had twice the number of right hand pieces needed, and no left handed ones. My first thought was the folks at Green Pepper had really messed up this pattern. There was the one error that they noted on the back of the instruction sheet, maybe they had made more. So I picked up the phone and called, getting through quickly to a staff member who told me that I had not read the small text where it said “FOLD”. It was explained to me that they try to keep everything as simple as possible and don’t expect people with only commercial experience to be using their patterns. This makes sense, I doubt that there are many out there who sew commercially that have not done some home sewing.

The good news is that I didn’t have to waste much material and quickly had both my left and right handed pieces cut out and ready to assemble. Everything went smoothly until I got to installing zippers. I carefully read the instructions, picked up one of the gaiters and installed the zipper. Then I picked up the second out of the pile and began thinking this was easy. I had been lucky the second time and had picked up a gaiter that was the same “hand” as the first. Then came the third and installed the first zipper half only to realize that it was on the wrong side of the gaiter and I had been foiled once again. Take the piece out and install the other half of the zipper in its place. I was on a roll and soon had them finished.

So what did I learn from this adventure?

  • Beware of “hands”.
  • Home sewing is quite different than commercial sewing. I have never had to deal with patterned/printed material and have trouble imagining how much more trouble that would add to making something.
  • The feeling of accomplishment when producing a present is great.
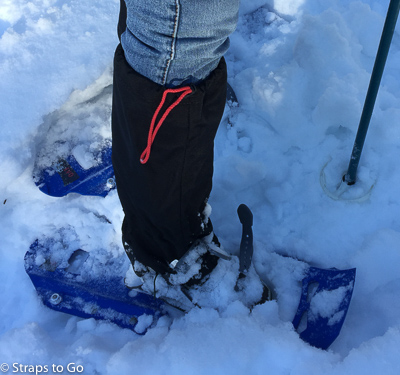
  • These gaiters keep our legs and feet dry!
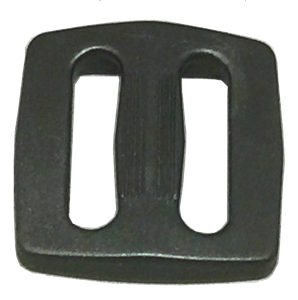
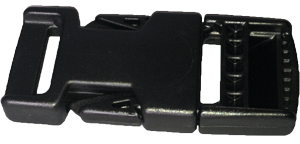
 

Nylon web dyeing

How does nylon webbing get its color? There are a number of ways, each with its own good and bad points.

One can dye the yarn as it is manufactured. This is called solution dyeing and the yarn ends up looking like this:

solution-dyed

The color goes all the way through the yarn and you end up with the most colorfast product. Some strength is lost and solution dyeing requires large production runs.


Another way is to dye the yarn after it has been drawn. This is called package dyeing and the finished yarn would look like:

package-dyed

The color is just on the outside and the strength of the yarn is not affected which is important in load bearing applications like safety harnesses. However if the yarn is used in a high abrasion application like a carpet having the color go all the way through is a plus.


Both of the methods discussed above require dyeing the yarn prior to manufacturing the webbing. If you have red yarn, you are going to get red webbing but what if you need purple (for all those Husky and Tiger fans)? Back to the vat to dye some purple yarn and then manufacture purple webbing. The minimum quantity you want to make is quite large for either of these processes. As with most items there are popular colors and those you just have to have but don’t sell in huge quantities. So how do you get all the colors offered without having to produce a lifetime supply of a marginal selling color?

The answer is to manufacture nylon webbing with un-dyed yarn (often called greige goods). Then when the order comes in for purple nylon webbing you piece dye your webbing. The end result will be webbing with good colorfastness without loss of strength. Like with package dyeing the color will just be on the outside, like staining wood. Minimum orders are low enough to allow for a wide variety of colors to meet all your needs.

Can you specify what process is used for your webbing? Not easily. If your needs are large enough to purchase a whole production run and you are willing to wait I am sure the mill will be willing to take your money. We deal with manufacturers we trust and the materials they provide meet our (and your) needs.

Weird Webbing Words

It’s time for a bit of fun and after the last two years of election campaigning, we all can use some. Every industry has words that are unique to it and some times they leave you scratching your head wondering how they were ever adopted. The webbing world has a few to add to the list.

  • Crock– not a pot, oops being from Washington pot has other meanings here. This is not a device for cooking or a load of malarkey but a test for colorfastness.
    Determines the amount of color transferred from the surface of colored textile material to other surfaces by rubbing.

    • Sample is placed on crock-meter
    • A 100% cotton white fabric cloth is rubbed across the sample 10 times in the wet and dry state
    • The cotton cloth is evaluated for staining
      So in order to do crock testing you need a crock-meter and now I had better quit while I am ahead! Just in case you want to see a video of a crock test here you go. Be careful, it’s not very exciting.


  • Denier- yes this is the correct spelling, the word is not dinner or diner. Like tex ( see below) denier refers to the weight or thickness of yarn. I see it used mostly when describing fabric weights. Some of the coated fabrics we use are 600d (the small ‘d’ is the abbreviation for denier) and other heavier ones are 1000d.
    A unit of weight by which the fineness of silk, rayon, or nylon yarn is measured, equal to the weight in grams of 9,000 meters of the yarn and often used to describe the thickness of hosiery.


  • Greige– possibly the worst looking word on the list. Some say it is a color that is between gray and beige. Most likely a relative of sepia, another one of those colors that is different to each individual. Don’t go telling a printer that you want sepia colored type on your business card. You will drive him/her to drink.
    In the webbing world it refers to unfinished goods; not fully processed; neither bleached or dyed.


  • Tex– obviously a misspelling by my grandson, it should be T-Rex but kids these days shorten everything.
    Or it is a way of measuring thread size-
    The Tex standard uses 1,000 meters of thread per gram as the starting point. This means if 1,000 meters of thread weighs one gram, it is Tex 1. If 1,000 meters of thread weighs 25 grams, it is Tex 25.
    On most of our straps we use Tex 90 threads when sewing, for some heavier jobs we use Tex 135 thread.


  • Warp– to move (a ship) along by hauling on a rope attached to a stationary object on shore or-
    (in weaving) the threads on a loom over and under which other threads (the weft) are passed to make cloth.


  • Weft– not a misspelling. While the Warp threads go lengthwise is a piece of fabric the Weft threads go left to right, or as I was taught- weft to right.

  • Woof– again this word has specific meanings here in Washington being the home of the Husky’s. Woof is what their mascot says, or a bunch of fans tailgating prior to a game. What does it have to do with webbing, nothing but it really sounds like it should be in the list.